Business
Animal-Themed Crafts

Animal-themed crafts are popular across various age groups for many reasons. Firstly, animal figures often resonate with people, especially when they are cute or endearing, such as corgis. These figures not only inspire creativity but also bring joy and satisfaction during the crafting process. For children, animal-themed craft projects like crocheting animal kits are not only fun activities but also help them learn about nature and animals, while developing hand-eye coordination and fine motor skills.
Adults also enjoy animal-themed crafts. Such crafts often become highlights of home decor or cherished parts of personal collections. Creating an animal figure by hand offers a meaningful pastime and serves as a personal expression of one’s appreciation for the natural world.
Additionally, animal-themed craft projects typically have high shareability on social media. Participants enjoy sharing their completed works, which not only earns community recognition but also inspires others to try similar projects. This culture of sharing promotes growth and interaction within the crafting community, strengthening the bonds among craft enthusiasts.
In educational settings, animal-themed craft projects allow teachers to guide students in exploring important topics such as biodiversity, animal habits, and ecological conservation. These projects are more than just artistic creations; they are educational tools that enhance holistic development.

To create a crocheted corgi, follow these steps, which are suitable for beginners and include basic crochet techniques and assembly instructions.
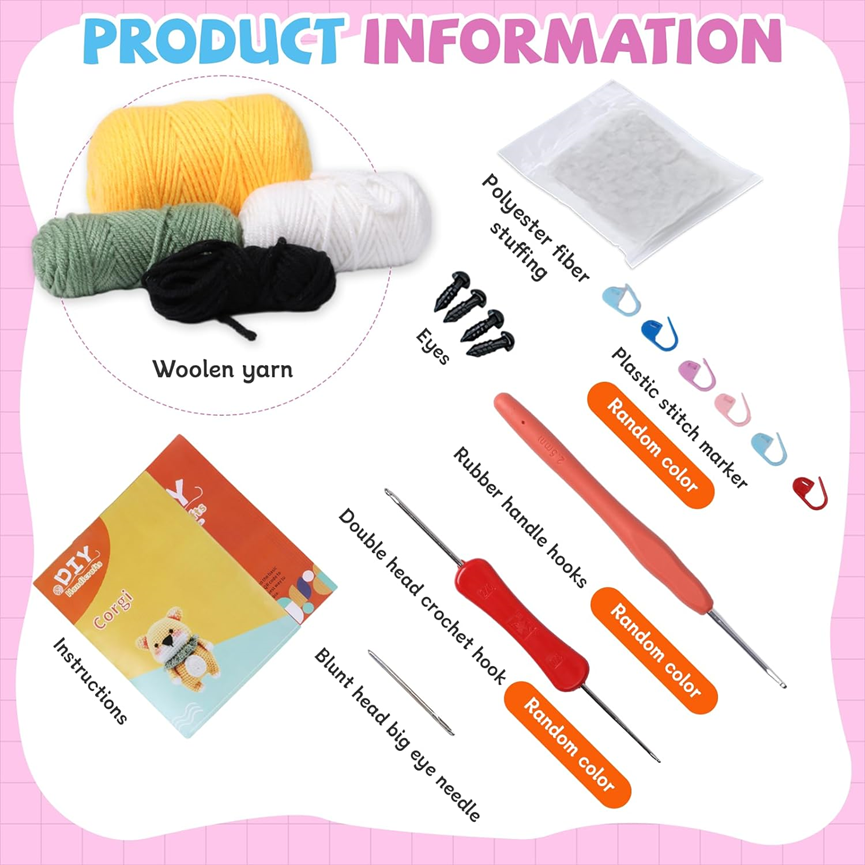
Materials Preparation
First, ensure you have the following materials:
– Crochet hook: Typically a size between 3.5mm and 5mm.
– Yarn: Choose yarn suitable for the crochet hook in colors typical of a corgi, such as brown, white, and black.
– Stuffing: Use polyester fiberfill to stuff your corgi, giving it both softness and elasticity.
– Thread: For sewing different parts together.
– Safety eyes: To add lively eyes to the craft.
– Scissors and tapestry needle.
Making Process
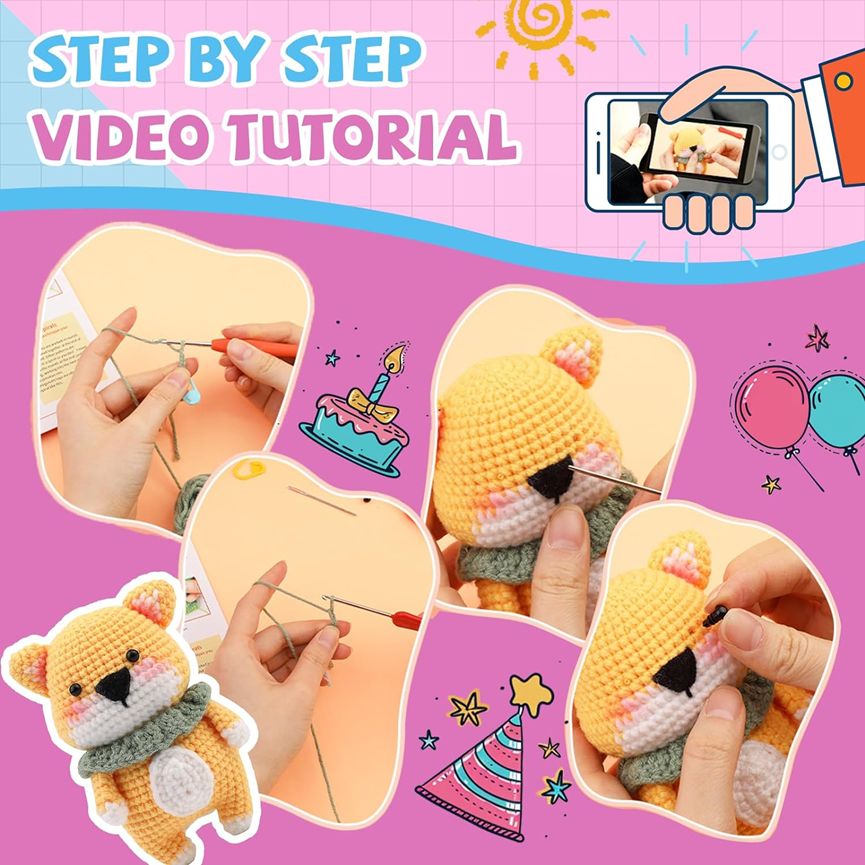
Step 1: Crochet the Basic Shapes
1. Body and Head: Start with the body of the corgi, which is usually an oval or cylindrical shape. Then, crochet a smaller circle for the head.
2. Limbs: Crochet four small cylinders for the legs, making sure they are proportionate in length and thickness to the body.
3. Tail and Ears: Crochet a small strip for the tail and two small triangles for the ears.
Step 2: Assemble and Detailing
1. Stuffing: Before sewing the parts together, fill the body, head, and limbs with the right amount of polyester fiberfill.
2. Sewing: Use the tapestry needle and thread to attach the head, limbs, ears, and tail to the body. Ensure all parts are securely attached to prevent them from coming off.
3. Add Safety Eyes: Place the safety eyes appropriately on the head. Make sure to add them before stuffing as it will be difficult to install them afterward.
Step 3: Final Touches
1. Facial Details: Use black or other colored yarn to embroider the nose and mouth.
2. Additional Decorations: If desired, add extra decorations such as a collar or a small bell.
By completing these steps, you will have created a cute crocheted corgi, which can serve as both a charming home decoration and a precious gift. Crochet kits for beginners is a relaxing activity that allows you to enjoy the process of creation and is also a great way to improve your crafting skills.
In summary, animal-themed crafts are popular due to their appeal, educational value, and social potential. Whether as a personal hobby or an educational tool, they offer a way for people to connect with nature, unleash creativity, and enjoy social interaction.